Whether you give your users access to a website, a mobile app, or another software product, usability testing before the launch will be of utmost importance. According to Forbes, various large brands report that usability design and UX testing have taken the business to the next level. IBM reports that every dollar invested in usability brings a return in the range from 10 to 100 dollars. Amazon’s Jeff Bezos invested in usability design 100 times more than in marketing during the portal’s first year. According to Bezos, this strategy was the one that led to Amazon’s overwhelming success.
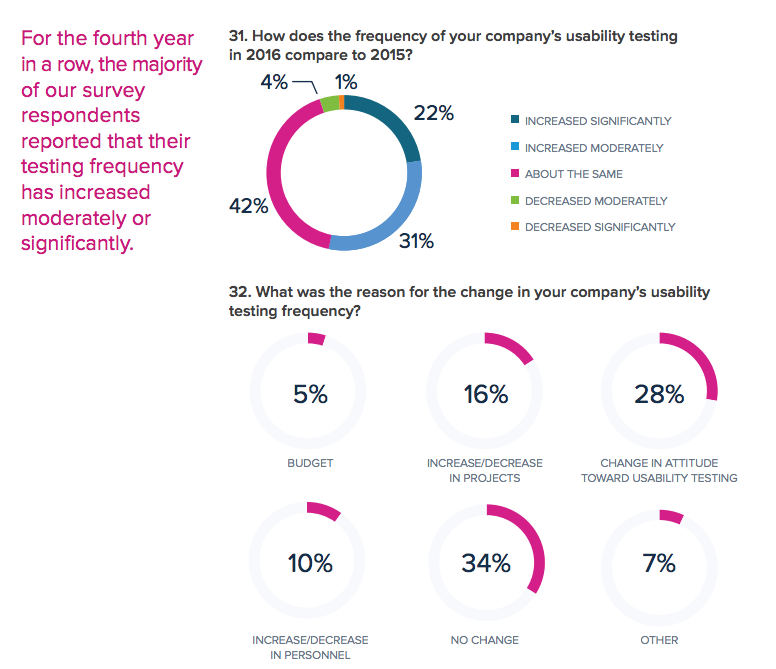
The chart focuses on how usability testing budgets have increased through the years.
The benefits of usability testing are easy to understand, but what does it take to carry out a powerful UX test that will lead to relevant results and improvements? The following guide will acquaint you with the essentials.
Build a Prototype or a Product to Test
In order to check the user experience, you need to have a product that you’re going to test.
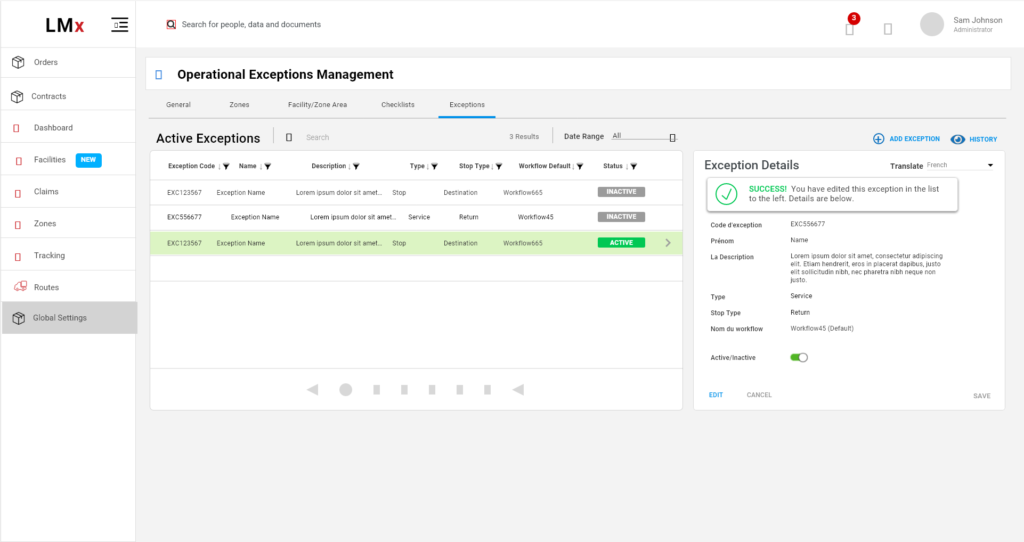
Prototype development is the first part of the process, regardless of the field that you specialize in. It can be a website that has limited functionality, a demo app or an interactive wireframe. The purpose is to test the concept and build upon the initial framework (or scrap the idea altogether).
Based on the original design, you should determine what you’d like to study and what the goals of the test are going to be. The absence of clearly-defined goals will make it almost impossible to test functionalities and experiences and choose the right metrics.
If you have a website, for example, you may want to ask yourself whether the navigation is clear enough and enabling people to go from the homepage to every other part of the website. In the case of an app, you may want to ask yourself whether the graphics put emphasis on the most important features users should be noticing right away.
Dozens of prototyping tools can be used for this first part of the process. Still, if you don’t have the necessary experience, you should definitely consider getting a professional involved.
Draft the Test Plan

Drafting a test plan or script is the next key step of usability testing. In a sense, you started working on it during the prototype development phase. The test plan should answer two important questions — what you are going to test and how you will measure the results.
Depending on the circumstances, you may have open-ended or specific tasks and questions.
Some open-ended tasks and questions will simply have the users going through the app for a certain period of time to acquaint themselves with it. This approach is going to be useful when:
- Attempting to identify areas that are most popular with users
- Working on common hindrances
- Doing exploratory research
Specific tasks let the users know what they’re trying to accomplish. The test measures whether accomplishing the respective task is going to be easy or difficult. Such a test is beneficial when:
- A concrete feature or functionality is to be explored
- The product is complex and it has to be tested in several stages
- You want to ensure conversion optimization
Recruit Test Participants
You have a prototype and you have an issue that you’d like to explore. The next part of the process is to identify the right test participants.
If you have a pretty good idea about your target audience or ideal customer persona, you’ll find it easy to recruit UX test participants. You want to come as close as the people who will be using the respective product, as possible.
Recruiting usability testing participants is usually one of the lengthiest processes. You should define the characteristics of the users as thoroughly as possible and you should also spread the information via the right channels. Once again, relying on professional help to accomplish this goal can give you the best possible outcome in the shortest amount of time.
Perform the Test
UX tests can have various formats.
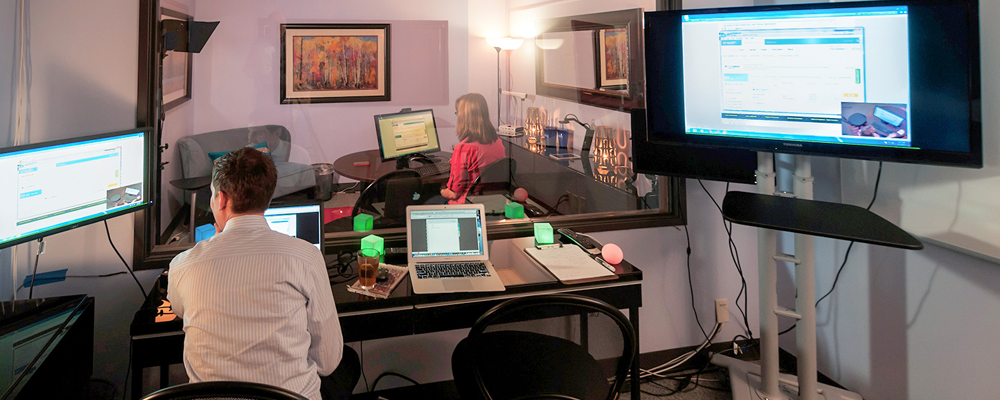
One of the options is acting as a moderator during a session and guiding the test participants through the process.
If you opt for such a timed session, however, you should be prepared for hindrances. It’s possible for some of the participants to arrive late. A technical malfunction may keep the prototype from working as expected. You should have a contingency plan for such situations.
Remote studies are unmoderated. Sometimes, getting all of the participants together in an office, for example, will keep them from exploring an app or a website in a manner that they would at home. Thus, remote testing could provide additional benefits. Needless to say, specific challenges could stem from this test methodology and you will have to be prepared once again.
Document the Test Results
Distilling, summarizing, and organizing usability testing results is going to be a time-consuming process. This, however, is one of the most important steps. Don’t rush through the process and double check for errors that could potentially make the data unreliable.
Findings can be documented in several ways:
- A spreadsheet with notes
- Audio recordings
- Screen grabs and video recordings
- Feedback and surveys filled out by the participants themselves
- Success rate percentage calculations
- Error rate percentage calculations
Based on this information, draft a report or a PowerPoint presentation that will address all of the following:
- Background: what the prototype is, what the demographic profile of the audience is, what the test hoped to accomplish
- Testing methodology
- Test results in the form of numbers, percentages and diagrams
- Findings and recommendations — this is the most detailed analytical part of the UX report
- A summary of potential solutions for the problems identified through usability testing
Correct Issues and Enhance the Performance
Finally, you’re ready to put the test findings to good use.
The final part of the process is fixing errors, addressing bugs and enhancing the user experience on the basis of the original framework and the feedback that you have received through the test process.
It’s usually best to generate multiple solutions for each of the issues that the test participants have identified. You may want to collaborate with developers and designers during this step to come up with viable fixes.
Once you have a few choices, you can prioritize the solutions that will work best to address the needs of particular demographic groups. The most effective solutions are the ones that can address multiple issues simultaneously, and these are the improvements that should be embraced.
Do not fear the UX testing process — it is an integral part of putting together a functional product on the market. While preliminary work and a lot of research will be required to determine what the best testing environment is going to be, the return on investment is going to be high, and it will justify the expenditure and effort put in every single step.


